| YouTube Videos |
| FILTERS: |
| ALL |
| USB Flash Drives |
| Android |
| Android-x86 |
| Backup Cloning |
| Chromecast |
| Dual Boot MultiBoot |
| Linux |
| Messaging IM SMS |
| Misc. Soc Media |
| Music Jazz MPB |
| Remote Controls |
| Screen Recording |
| Smart-TV IPTV |
| Windows |
 |
Krister's Blog krister at hallergard dot com | Last Updated: 2014-12-19 |
Here I will create a multiboot 64 GB USB Flash Drive with four proper installations - not just ISO-files. In three of the four cases I will be lazy and just clone working installations from my desktop by copying (Windows XP), or by restoring partition images (Linux Kubuntu and Android-x86). Of course installing directly to the USB-stick is possible, and I will do that in the fourth (Puppy Linux) case.
 View Video 13 min
|
Partition 1: Windows XP SP3:
This was my starting point, my entire 30 GB Windows XP installation copied to the 64 GB USB-stick. It was very, very slow! So I decided to make it more useful by adding (copying over) rescue tools, notably UBCD4Windows and by adding three partitions, of which one (Puppy Linux) also contains many rescue tools. With Windows XP you can normally just copy over an installation - as long as you first delete the MountedDevices entries in the registry of the source. But this does not work with a USB-Stick - you will have to "repair" the copied installation with a specially modified installation CD. It is mainly the USB drivers that have to be changed. More details can be found in my blog and on my YouTube channel. On a USB-stick I prefer using the first partition for Windows and for this I prefer using file system NTFS rather than FAT32. |
MountedDevices Folder XPusbSP3: burn to modified Installation CD |
|
Shrinking Part 1: Creating part 2, 3 & 4:
I have previously used the Ranish Partition Manager to shrink partitions, but have concluded that it is better to use GParted, as Ranish otherwise leaves conflicting information about the shrunken partition size, which at times can create problems. Partitioning and formatting with GParted is quite straightforward. I use ext3 file system because of PartImage, which I use to backup and restore Linux partitions. If not using Ranish, you can use GParted for setting the boot flag on the partition you want to boot. |
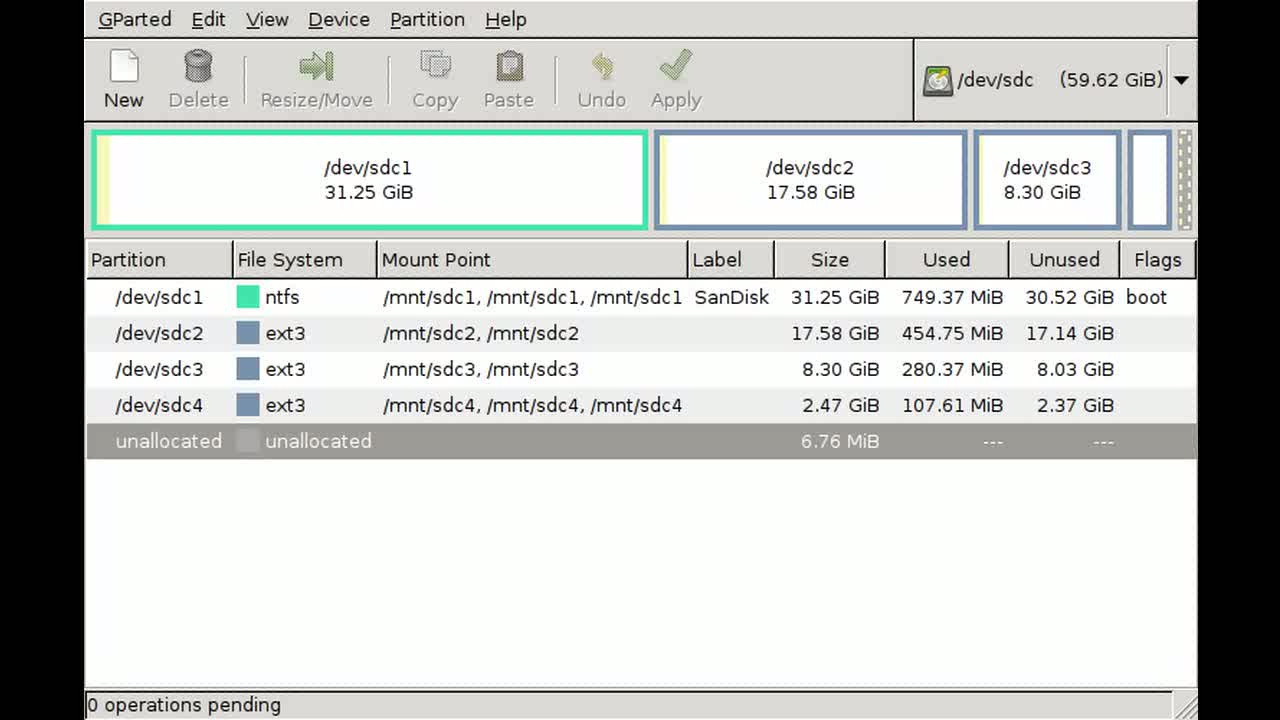 GParted after partitioning |
|
Partition 2: Linux Kubuntu 14.04 LTS - 32-bit:
On my second disk I have space for several partitions, which I use for tests. All but one are hidden, and I use sdb3 for the active one. Here I installed Linux Kubuntu 32-bit, which would be more likely to function on older host computers than a 64-bit installation. This partition I cloned onto the USB-stick using PartImage. Quite straightforward. | |
|
To install a Grub2 bootloader I used the following commands in a root terminal: mount /mnt/sdc2 grub-install --force --root-directory=/mnt/sdc2 /dev/sdc2 The clone on the USB-stick has the same univerally unique identifier (UUID) as the source, which would lead to confusion if both were present while booting. I have found it easier to just hide the source partition. But if that is not conveniant, the UUID of the target has to be changed, also in /etc/fstab and the bootmenu (/boot/grub/grub.cfg). I usually just edit section 10 of grub.cfg before the first boot, and then do the "update-grub", which updates all of the grub.cfg. When booting on a new host, it might be a good idea to run "update-grub". As the clone is lightly smaller than the partition, I usually resize to match in a root terminal: resize2fs /dev/sdc2 |
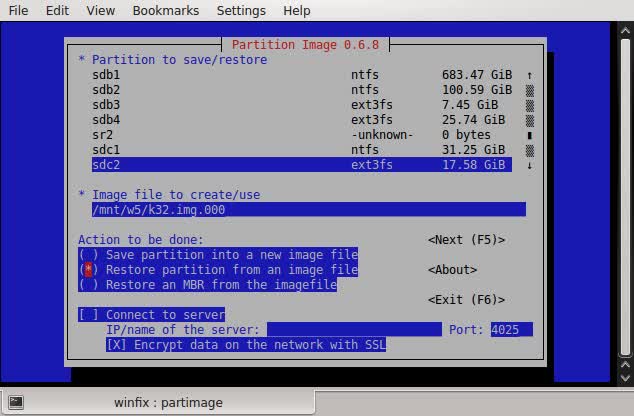 Restoring Kubuntu image to sdc2 |
|
Running Linux on the USB-stick is slow, but not half as slow as Windows XP on a USB-stick. Compared to the "persistant" Linux installations on USB-sticks
the performance is at least as good, in my opinion.
| |
|
Partition 3: Android-x86 4.4 r1:
Also here I cloned a partition from sdb3 using PartImage - quite straightforward. With Android I have experienced boot confusion, when two installations have been present at boot time, even when using different UUIDs. So after cloning I keep the source partition hidden. The source includes a Legacy Grub (Grub1) bootloader, but the partition boot record has to be fixed. This is done while rebooting to a Grub1 prompt (available on partition 1) with these commands (booting the USB-stick as the first device): root (hd0,2) setup (hd0,2) After the first boot the bootmenu (menu.lst) can usually do with an edit. Also I normally resize to match the partition, in a root terminal: resize2fs /dev/sdc3 |
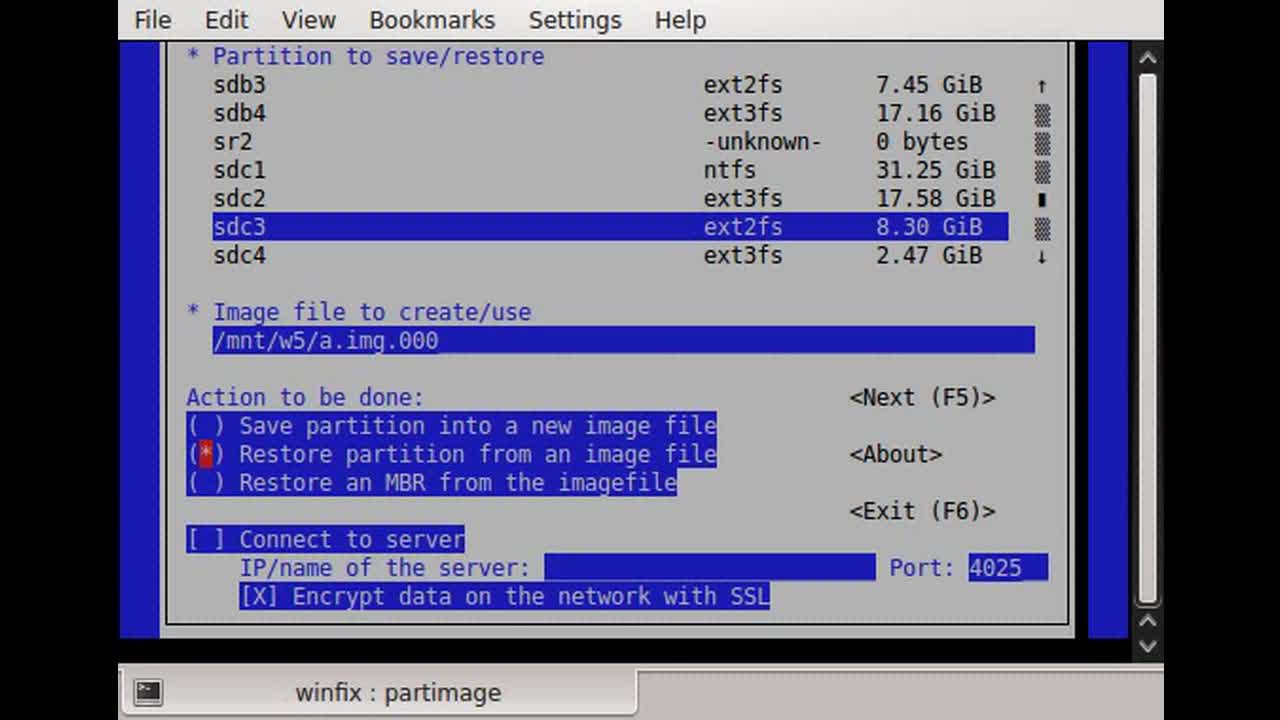 Restoring Android to sdc3 |
|
Partition 4: Puppy Linux 6.0 "Tahrpup":
Here I installed to partition sdc4 using the Installation CD. Had to use the option to install to a USB hard drive, as it did not let me choose the option USB flash drive. Then I tried to install the Grub4dos bootloader, but got an error message when trying to install the boot record to sdc4. So I copied a Grub1 folder, and edited the bootmenu to suit Puppy Linux. And then followed the procedure above for installing the Grub1 boot record. |
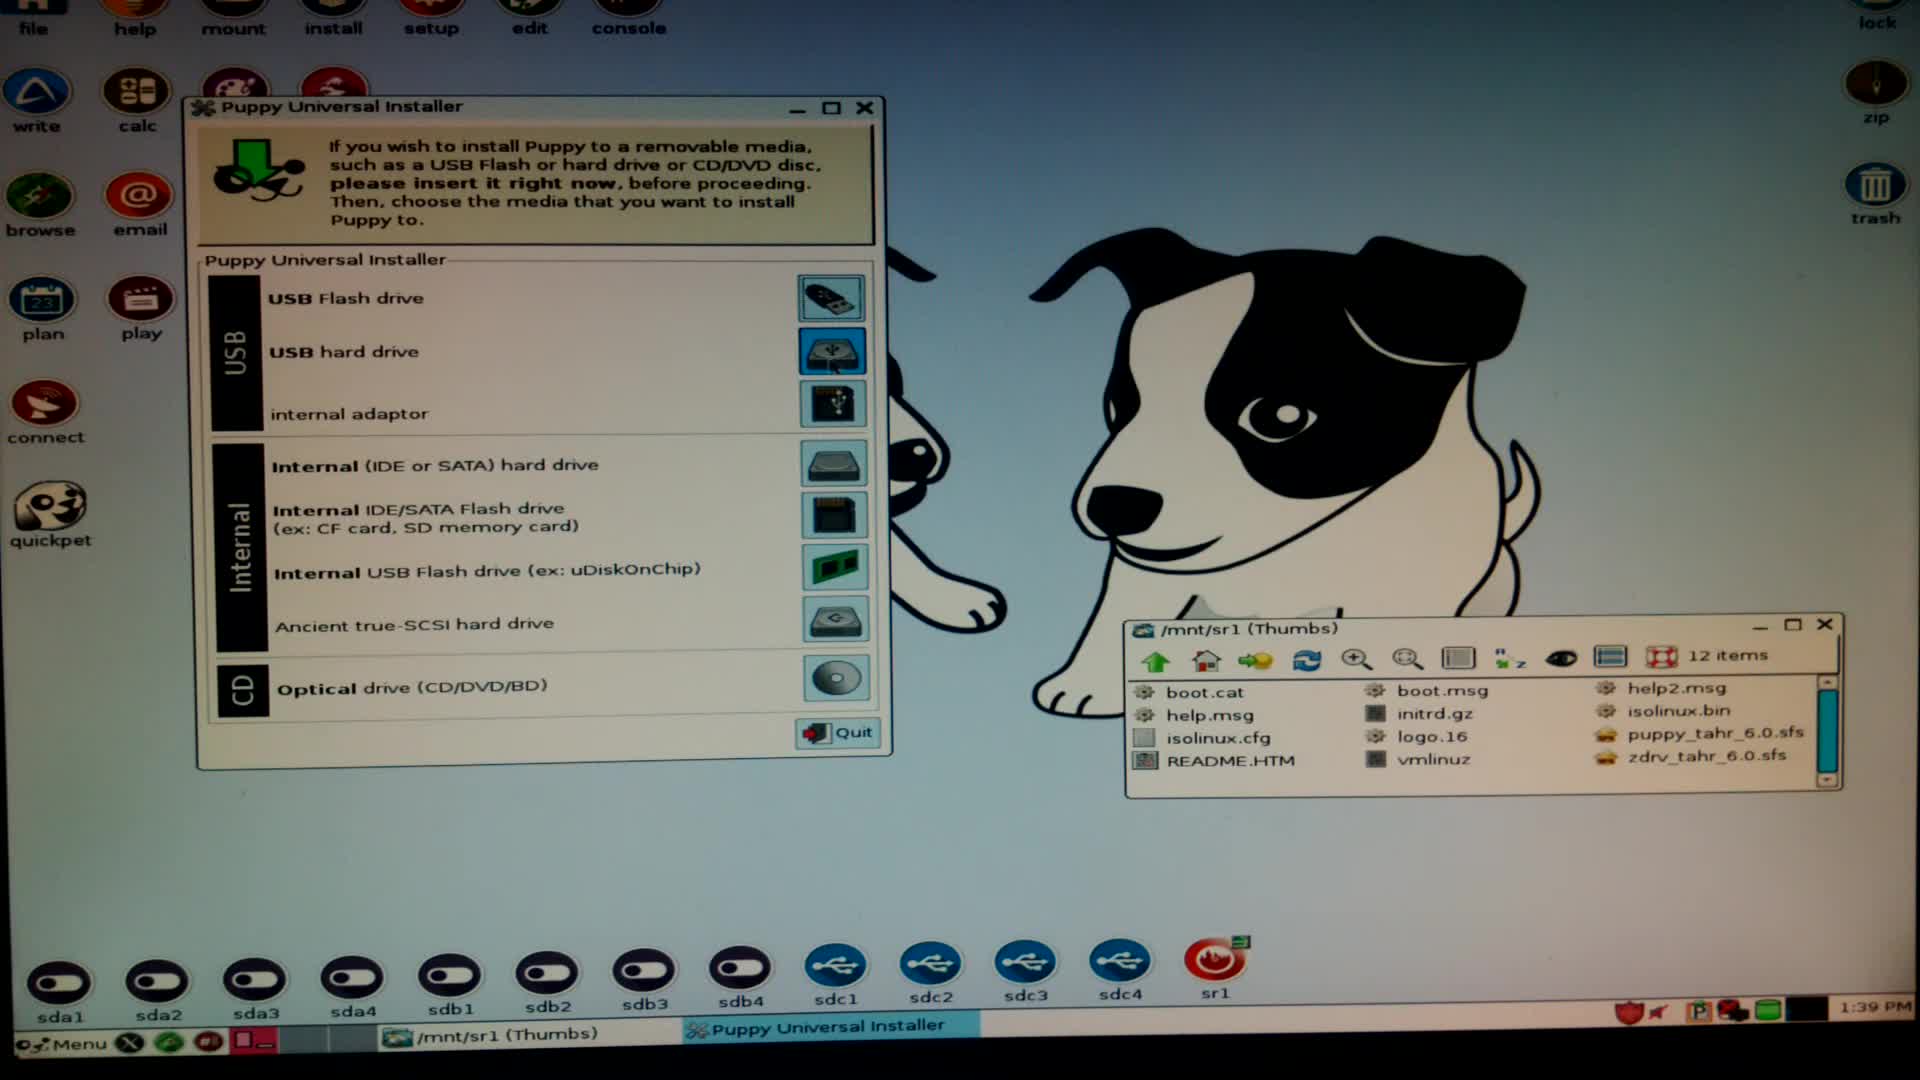 Installing Puppy on sdc4 |
 |
Bootmenus:
All four systems could be made available in the bootmenus, as they are always physically available on the USB-stick. In the case of Linux Kubuntu I suggest running the "update-grub" command for each new host PC. The other bootmenus could be edited manually once and for all. I try to have generic entries to fit many possible host configurations, Grub4Dos on partition 1 is especially suited for this. The generic entries are dependent on which device you enter first. Windows requires being the first device, so I have made all generic entries based on booting the USB-stick as the first device. For the bootmenus, see the next page! |
|
Booting on different hosts:
It is an important limitation, that these systems might not boot on all hosts, due to very different hardware. Windows seems very sensitive in this respect. The Windows XP on the USB-stick failed miserably when trying to boot on my wife's laptop, while the three other systems managed fine. An advantage with the Ranish Partition Manager is that it can give immediate access to a hosts' partition table, and to change the boot flags on the host (and on the USB-stick itself). |
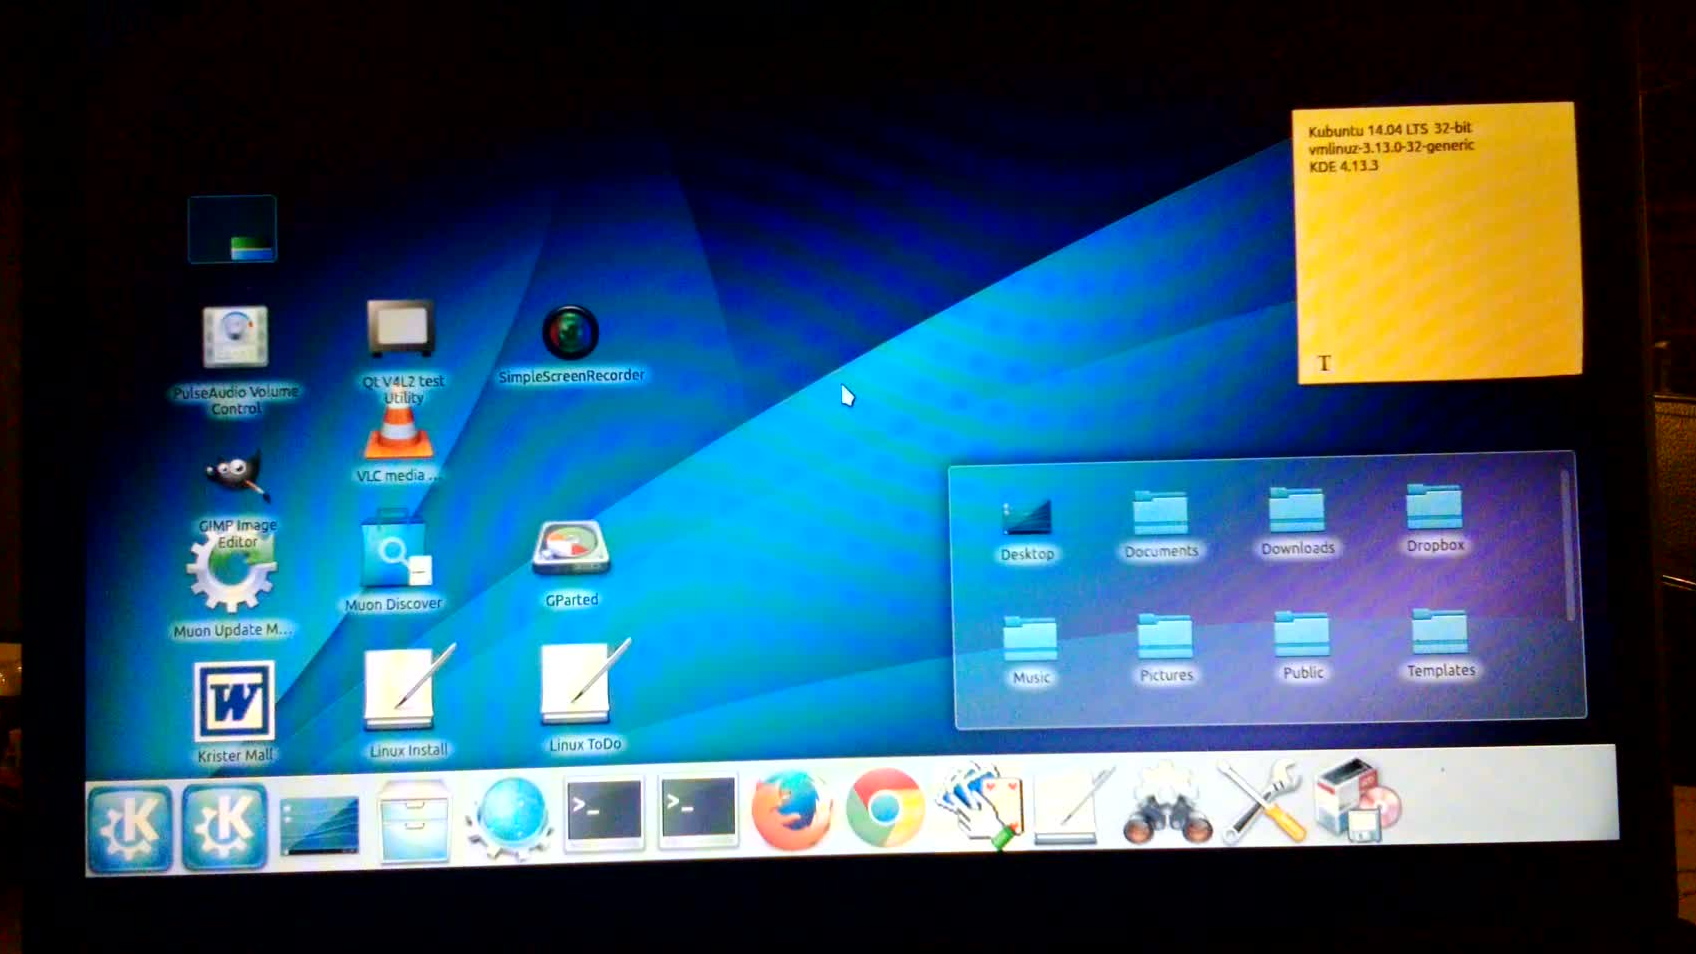 Host Laptop - Kubuntu |